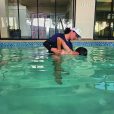
As a risk manager at Redwoods, I have had the opportunity to perform risk management assessments at hundreds of aquatics facilities around the nation.
I’ve observed lifeguard performance at aquatic environments ranging from standard lap pools to indoor waterparks to lake front operations. I’ve seen the quality of lifeguarding improve significantly, largely thanks to dedicated aquatics professionals across the country who focus on training, auditing and, most importantly, holding lifeguards accountable as professionals in their industry.
However, there is one area that continues to fall short at most of the facilities I visit: lifeguard rotations.
Drownings happen quickly: A child can silently slip under water in as little as 10 seconds. Yet during far too many rotations, I observe gaps in scanning lasting from 20 seconds to several minutes. I frequently see guards exiting their lifeguard stands before the rotating guard ever arrives. During rotations, some guards have extended conversations, take care of other duties and generally don’t watch the water. What could happen in your pool during that time?
In drowning prevention, seconds count — after only 30 seconds a person may lose consciousness and aspirate water. Add to this the inherent difficulty in seeing a victim on the bottom of a pool — or, worse, a lake — and it becomes clear why diligence in rotations is essential. Not only does an effective rotation allow lifeguards to maintain zone coverage 100 percent of the time, but it allows the patrons you serve to see the professionalism of your guards at all times, giving them confidence that your facility is as safe as it can be.
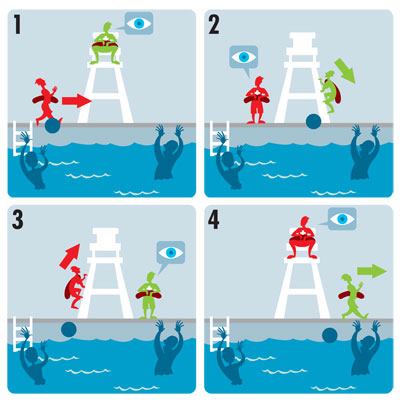
Truly professional rotations ensure that there is no gap in scanning, and that guards focus on scanning at all times. The following five key steps sum up the best lifeguard rotation procedures our risk managers have observed. All of these steps can be easily implemented at your facility. When they are all followed, no gaps in zone coverage take place and the guard coming on duty has knowledge of swimmers in their zone.
1. Incoming guard walks the perimeter and scans the entire zone. When coming on duty or moving to a new position, the lifeguard should walk the edge of the pool and scan the entire bottom, to verify that he or she is starting with a safe pool. This is an ideal time to check the corners or other challenging areas. The guard should look for anything unusual in the pool or any person in distress.
2. Incoming guard scans as outgoing guard exits the chair. The guard coming on duty should stand adjacent to the chair, take the rescue tube from the on-duty guard if the guard does not have his or her own, and actively scan the zone while the on-duty guard exits the chair to maintain zone coverage.
3. Information is exchanged. Information about special events or activities, high-risk situations, and potential behavior challenges should be shared between the two lifeguards without interrupting scanning, so the new guard is set up for success. Examples of such an exchange can include pointing out nonswimmers or swimmers with special needs, anyone needing reminders of pool rules, or anything else that deserves extra attention.
4. Outgoing guard scans as incoming guard gets situated. This is the opposite of step two. Make sure the outgoing lifeguard does not leave the area until the new lifeguard is situated. The outgoing guard takes back responsibility for scanning the zone, taking back the rescue tube if it had been relinquished before, while the incoming guard takes the stand. Once the new guard is situated, the rescue tube is passed back, if necessary, and the outgoing guard then can leave the station.
5. Outgoing guard walks the perimeter and scans the entire zone. This is the same as step one. Whether moving to a new chair or leaving the pool deck, the lifeguard should do a full sweep of the pool bottom and then scan the surface. The guard ensures that he or she has completed a safe shift and is leaving a pool or a zone where the patrons are safe.