In June 2013, I wrote about in-water ventilation drills. Because this is such a difficult drill to perform, I want to revisit the topic to address the five most common training challenges and how to overcome them.
Providing in-water ventilations requires extensive training and a keen understanding of when to use this technique. If your agency should support the idea of in-water ventilations, it should have protocols established for when to administer them. Medical Position Statement 08 from the International Life Saving Federation goes over the science and the historical background of the maneuver and clearly illustrates the scenarios when an in-water ventilation is appropriate.
The parameters outlined are: the rescuer(s) are unable to get the victim to the shore or onto a pool deck quickly; the status of the victim is unconscious, not breathing with a pulse, and has no injuries suggesting head or spinal trauma; and definitive care will be delayed by 30 seconds or longer.
Article continues below.
For more videos of single-rescuer in-water ventilation drills, click here.
Here are the challenges I’ve encountered that will affect both the single rescuer and the team rescue response.
Mask access
When there is not enough masks and hip packs to train with or use while on duty, and when the only masks available are staged in the lifeguard stands, this delays care to the victim. This is especially true if the victim is pulled from the water far from the lifeguard stand or in a remote area. I believe that all rescuers should have a resuscitation mask with a one-way valve attached that is ready to use.
Assembly required
If the rescuer needs to assemble their mask with the one-way valve, this will delay care. That is why the mask should be stored in a pouch of the hip pack and not within the manufacturer’s case. This will allow quicker access.
Also, don’t store the mask in a pouch that contains additional items such as gloves, Band-Aids and wristbands. These will be a distraction and will fall out once the rescuer opens the pouch, slowing down care. The rescuer should also be able to quickly pull the mask out, shake out any water within the mask, and have it ready to be placed on the victim. This maneuver should be done by touch only, in shallow or deep water. Precious time is wasted when the rescuer is looking for the zipper or access point on the hip pack to remove the resuscitation mask under refracting water.
Get real
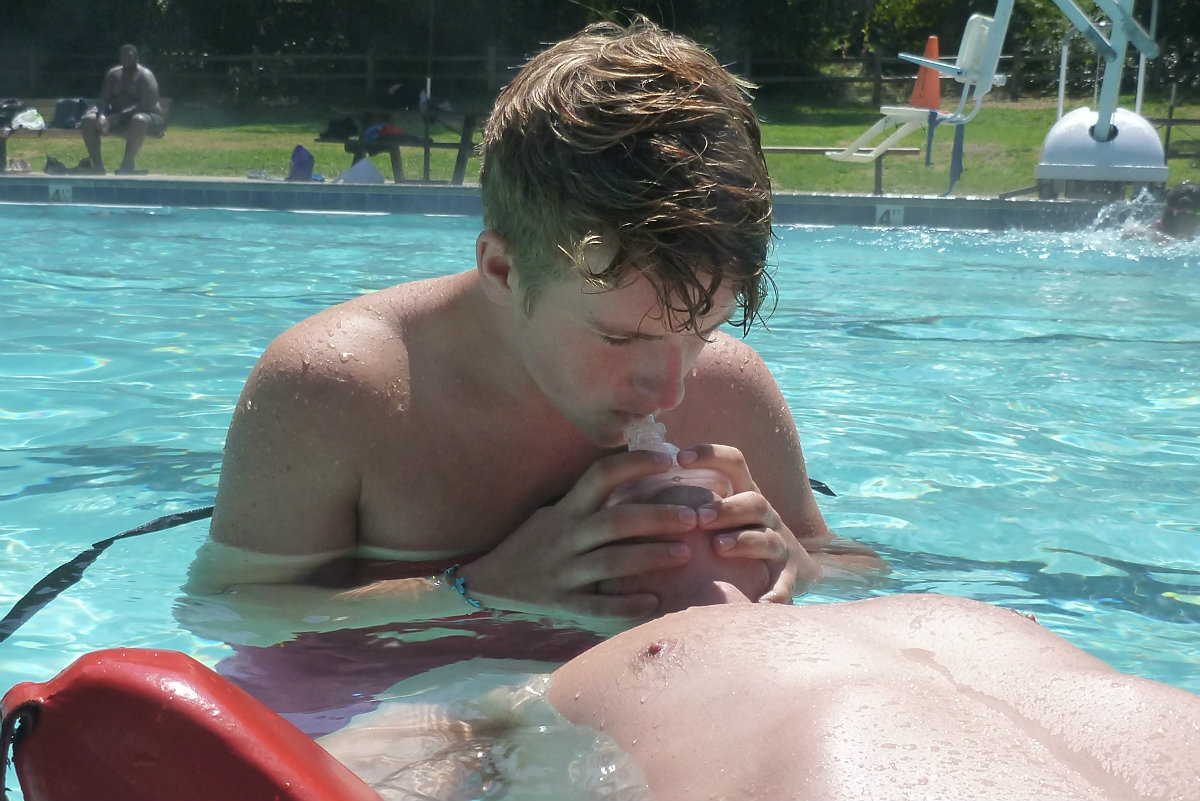
Too often, ventilation training is only done on a manikin, which consists of hard, unyielding facial features. It is common practice that, if the rescuer cannot secure a good seal on the manikin, they will be encouraged to press harder down on the manikin’s face. When it comes time to execute this technique on a real person, you could injure the victim. That’s why you should practice proper mask placement and sealing on a real person. A human face has bony features and plenty of fleshy, spongy areas around the mouth, cheeks and nose that will aid in getting a good seal.
Permission to breathe
It is imperative to practice putting a real breath into a real person. Rescuers need to develop a feeling for what it is like to have an effective breath go into a person. An effective breath has good title volume and can make the chest adequately rise. Work with your agency to get permission to practice this skill. If the agency is hesitant, consider this: When the aquatics incident happens, and your staff is required to give ventilations to a victim, you don’t want this to be their very first time, especially when your public will be video recording the incident with their phones. Rescuers can utilize mouthwash or a breath mint prior to practicing this skill for the benefit of the recipient.
Use your voice
Rescuers commonly fail to communicate immediate needs, bringing victim treatment to a halt. Clear communication between rescuers is imperative in a team-rescue response. Rescuers also must know the progression steps of the maneuver so they can complement each other and increase the speed of their definitive care.
Here is the training progression for the single rescuer:
Conduct an orientation of in-water ventilation that reviews how to seal the mask on a real person from a cephalic position, verify that the seal works both on the surface and underwater, how to properly place the rescue tube so it supports the victim and maintains an open airway, and how to position rescuers around a victim.
Lastly, if the agency allows, in-water ventilation drills will include a volunteer who is willing to let staff ventilate them for a least two successful breaths.
The drills for a single rescuer should be conducted with the victim face-up on the surface, directly under the backstroke flags (approximately 10 feet from the edge of the pool), and the rescuer starting from the side of the pool.
The drills progress like this:
• Place the victim on the rescue tube.
• Place the victim on the rescue tube and pull out resuscitation mask.
• Place the victim, pull the mask, shake it out, and place the mask on the victim.
Once the rescuer can perform all these drills, transition to a submerged victim and do the following drill progression:
• Get to the victim and bring their airway above the surface. (Remember: we’re trying to stop the drowning process.)
• Bring the victim to the surface and place them on a rescue tube.
• Place the victim on the rescue tube and pull out resuscitation mask.
• Place the victim, pull the mask, shake it out, and place the mask on the victim.
Once the rescuer can perform this second drill progression, incorporate a deck entry. Move the victim 10 feet past the backstroke flags and start with the victim on the surface:
• Enter the water safely, place the victim on the rescue tube, pull the mask, shake it out and prepare to give breaths.
Once the rescuer is successful at completing this drill, change to a submerged victim. Once successful, move the submerged victim to mid-depth (5-7 feet) and perform the same drill.
In the last part of the training progression, situate the victim in deep water (more than 7 feet deep) and perform the following:
• Enter the water safely, place the victim on the rescue tube, pull the mask, shake it out and give two effective breaths.
The team rescuer response requires slightly different drills:
The rescue team needs to figure out the sequencing of their actions. For a two-rescuer team, it should go as follows:
• Primary rescues victim, and prepares to give ventilations.
• Secondary rescuer places the rescue tube, pulls resuscitation mask and preps it for the primary rescuer.
• Primary rescuer gives breaths.
• Secondary rescuer assists the primary rescuer and begins to determine the quickest extrication route.
Article continues below.
For videos of team-rescuer in-water ventilation drills, click here.
Practicing coordination and the ability of the single rescuer and team rescue response to adapt and change plans in a moment’s notice are crucial for in-water ventilations to be effective and successful. Continue to practice, and you’ll see your staff become fast, proficient and confident. Good luck, and keep training.


